Animals
 Animation
 Art of Playing Cards
 Drugs
Drugs Education
 Environment
 Flying
 History
 Humour
 Immigration
 Info/Tech
 Intellectual/Entertaining
 Lifestyles
 Men
Men Money/Politics/Law
 New Jersey
 Odds and Oddities
 Older & Under
 Photography
 Prisons
 Relationships
 Science
 Social/Cultural
 Terrorism
 Wellington
 Working
 Zero Return Investment
Model/Material/Map/Animate/Render/Post
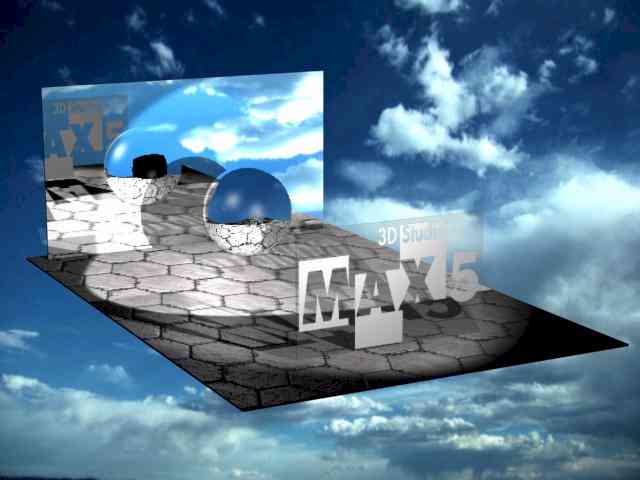
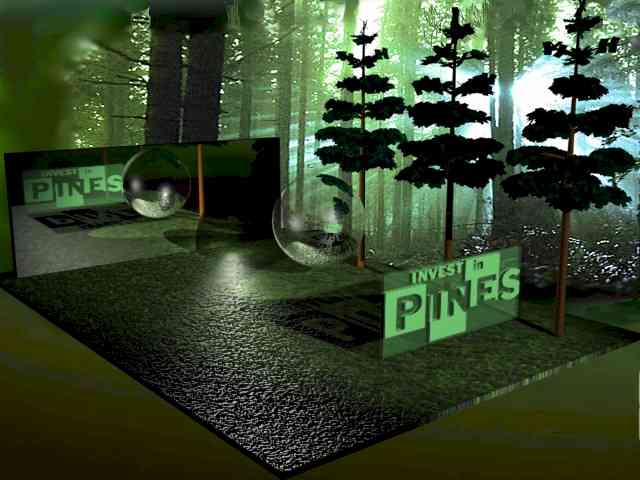
3D Studio Max Class Page 2I think that a model should not diversify too much from its objectives. - Adriana Sklenarikova A model is useful if it allows us to get use out of it. - Edward De Bono Nature is inside art as its content, not outside as its model. - Marilyn French Project 4: Reflections and MultimediaOur assignment: to create a specular, planar UVW- and bump-mapped floor, a partially transparent front panel, a back mirror using multi/sub objects, and a raytraced reflective sphere. We were to create and use spotlights to cast raytraced shadows, controlling the hotspots and falloff for maximum effect and, finally, to add a complementary environment map.
Cody's, my first attempt, my second attempt (I couldn't decide which to submit) and Wolf's (which I think is beautiful) In class we learned three-point lighting, types of lights, shadows, refection and refraction.
Project 5: Compositing and Camera MatchingOur assignment: To add animated elements to live footage. With a moving camera we were to produce a short video clip which contained at least six markers. We were to set up trackers, perform tracking, then add our own objects which moved with the camera so that the objects looked as if they were a part of the scene.
Click to play: Cody's, mine, Wolf's In class we learned how to choose markers and how to use bluescreening to put live footage into a rendered scene.
I spent several hours online looking for interesting rendered objects - I wanted something really different. I found a beautiful rendered grand piano. My idea was to take a stool to the cemetery, put it in the middle of one of the empty streets, and have Wolf pretend to play the piano while I filmed him as I walked in a big arc around him. I thought he would be seen on one side of the piano's open top, then, as the camera panned around the piano, he would appear on the other side of the top. I would then add classical piano music - his hands weren't visible at any time to add to the illusion. Off we went to the cemetery. But the middle of the street wouldn't do - no place for enough markers on different planes. So we ended up setting up in front of the door of a crypt with a broad slate patio out front. Putting up and measuring the markers took a long time - we used removable stick-on dots about 1" across. After all the set-up-and-measure time, the film turned out unsatisfactory because the ground on which I had to walk to pan around Wolf was too uneven as the crypt was midway up a slight slope. The camera jiggled way too much, no matter how steady I tried to hold it. I hoped I could smooth out some of the jiggles when I edited the film, but we decided to set up in front of another crypt just in case. The markers at the new crypt site were easier as there were rosettes built around the doorway. But the doorway wasn't square: the top narrowed slightly - nor exactly upright: the top also tipped inward slightly. That made the measurements more difficult, but the ground around the crypt was smoother, so I thought it might be all right - unfortunately, the camera was in the sun part of the time, which caused it problems. Edit as I might, when I put the grand piano into the scene, it shimmied as if there were a minor earthquake. I saw that rendering a large object into that scene was impossible because it magnified any jiggles caused by my unsteadiness and the fact that my measurements weren't quite accurate enough. I could see I was going to have to start over. Next, I took the camera to school and we filmed the fireplace in the student centre - I put three markers on the fireplace hood (large, stick-on-but-removable yellow dots on a large bronze hood), put a styrofoam cup on the raised hearth (which I measured to the centre of the top edge and the bottom edge) on one side and a small white box on the other - that made my six markers. I even used a yellow label on the ladder a workman had left stashed underneath the raised hearth to give me an extra marker and an extra plane in case something proved unsuitable with one of the others. I put the camera on a low table that had smooth round buttons on the bottoms of its legs so that the table could be pushed gently across the carpet. I thought that would get rid of any jiggle - perfect! - or so I thought. I intended to put a houseplant on the floor, a chessboard on the hearth, and a fire in the fireplace - because those were three other nicely-rendered objects I had found online. Actually, the lighting in the student centre was too dim. The viewfinder played the segments I filmed back back to me as looking fine, but when I uploaded them to my computer, they were all almost black. I used an editing program to lighten them - and found everything in the room went shades of green. I colour-corrected as best I could and finally felt I had something I could use. However... correcting for the green caused my three yellow dots and the ladder's yellow label to blend into the background enough in some frames that the computer would occasionally lose track of one or more markers and fix instead on some nearby dot-looking object. In my resulting film, the fire danced out of the fireplace and into the air and the plant looked as if it were on rollers - it went skittering across the carpet. I decided not to even try the chessboard (Cody ended up using that). On top of everything else, I discovered a round cup made a terrible marker - and I had tried using it for two of mine - because, as I panned, what was the "centre" of the cup when I started would move slowly around the edge. (I should have put a black "x" on the bright white cup.) Since the cup had a 2-inch radius, and since the cup was my origin point, this meant all my markers got progressively out of sync. No wonder everything was dancing! I had also come to realised that a huge problem was the quality of my equipment - I was using a digital camera that also happened to be able to take about 15 seconds of supposedly high quality footage. The camera is great as a camera, but as a camcorder, it wasn't working. I learned that when the instruction manual said "high quality", they meant high quality for a digital camera. Cody went online and priced camcorders - to get one with the features we needed would cost about US$2500 - that's an awful lot to pay just to ensure we made good grades on this assignment! How to handle this? The fireplace footage consisted of 399 frames. I ended up hand editing a few frames, to keep the fire and the plant where they belonged. I'll have to say that I learned much more overall than I would have if everything had gone smoothly the first time I tried. My advice? Measure everything at least twice!.
Wolf's project originally involved replacing our kitchen stove with a rendered stove - which he soon realized was impossible because his knee was in front of our stove in the clip he made. So he tried replacing the dishwasher with the rendered stove, but that didn't work either because the rendered stove wandered over in front of the refrigerator toward the end of the clip. So he put the rendered stove beside our stove - a perfect solution because it moves out of camera range before it begins seriously jumping around. Putting a rendered head in place of his head was an afterthought since the stove didn't quite work out - a fortuitous accident, since he ended up liking that better than he would have the stove, anyway.
While researching camcorders, Cody ran across an interesting article about video editing.
Project 6: Forward KinematicsOur assignment: To build a floor, then a foot, ankle, knee, thigh, hip and "body"; link the parts together with the foot as the parent, then make the leg squat twice, jump in a smooth arc, land with a crouch, then return to normal. We were to fine tune the motion trajectory path to ensure smoothness. If we wanted our object to have two legs, that was up to us.
Click to Play - Cody's, mine, Wolf's In class we learned about the major methods of motion capture: optical (cameras read information from sensors attached to performers), electromagnetic (computers record sensor data) and mechanical (puppets are often used for non-human motion capture).
The main thing this project taught me was how much I still have to learn. Click here for:
Click here for:
Click here for:
If you're interested in having a any of the files, please contact me. We are using version 5 of 3D Studio Max (because that's what we use in class). We're all hoping that for next semester's advanced class we'll get to upgrade to the new Max 6 (this is in 2003 after all). (And we did...) Advanced 3D Studio Max projects
For more animation, video clips, and shockwave games click the "Up" button below to take you to the index page for this Animation section where you will find all sorts of things. |